The day before we left on our epic Grand Canyon adventure, I was at Target looking for things to entertain kids when a thought occurred to me. The Man doesn’t use printed maps anymore, depending entirely on his phone for directions, so I thought it would be fun for the kids to buy a state map and mark our route on it as we traveled. It could provide a sense of perspective that you don’t get from a 5.7 inch diagonal display (The Man is a fan of his ZMAX phablet).
But what would we do with this map afterward? Would its destiny be to moulder amongst other forgotten relics of road trips past?
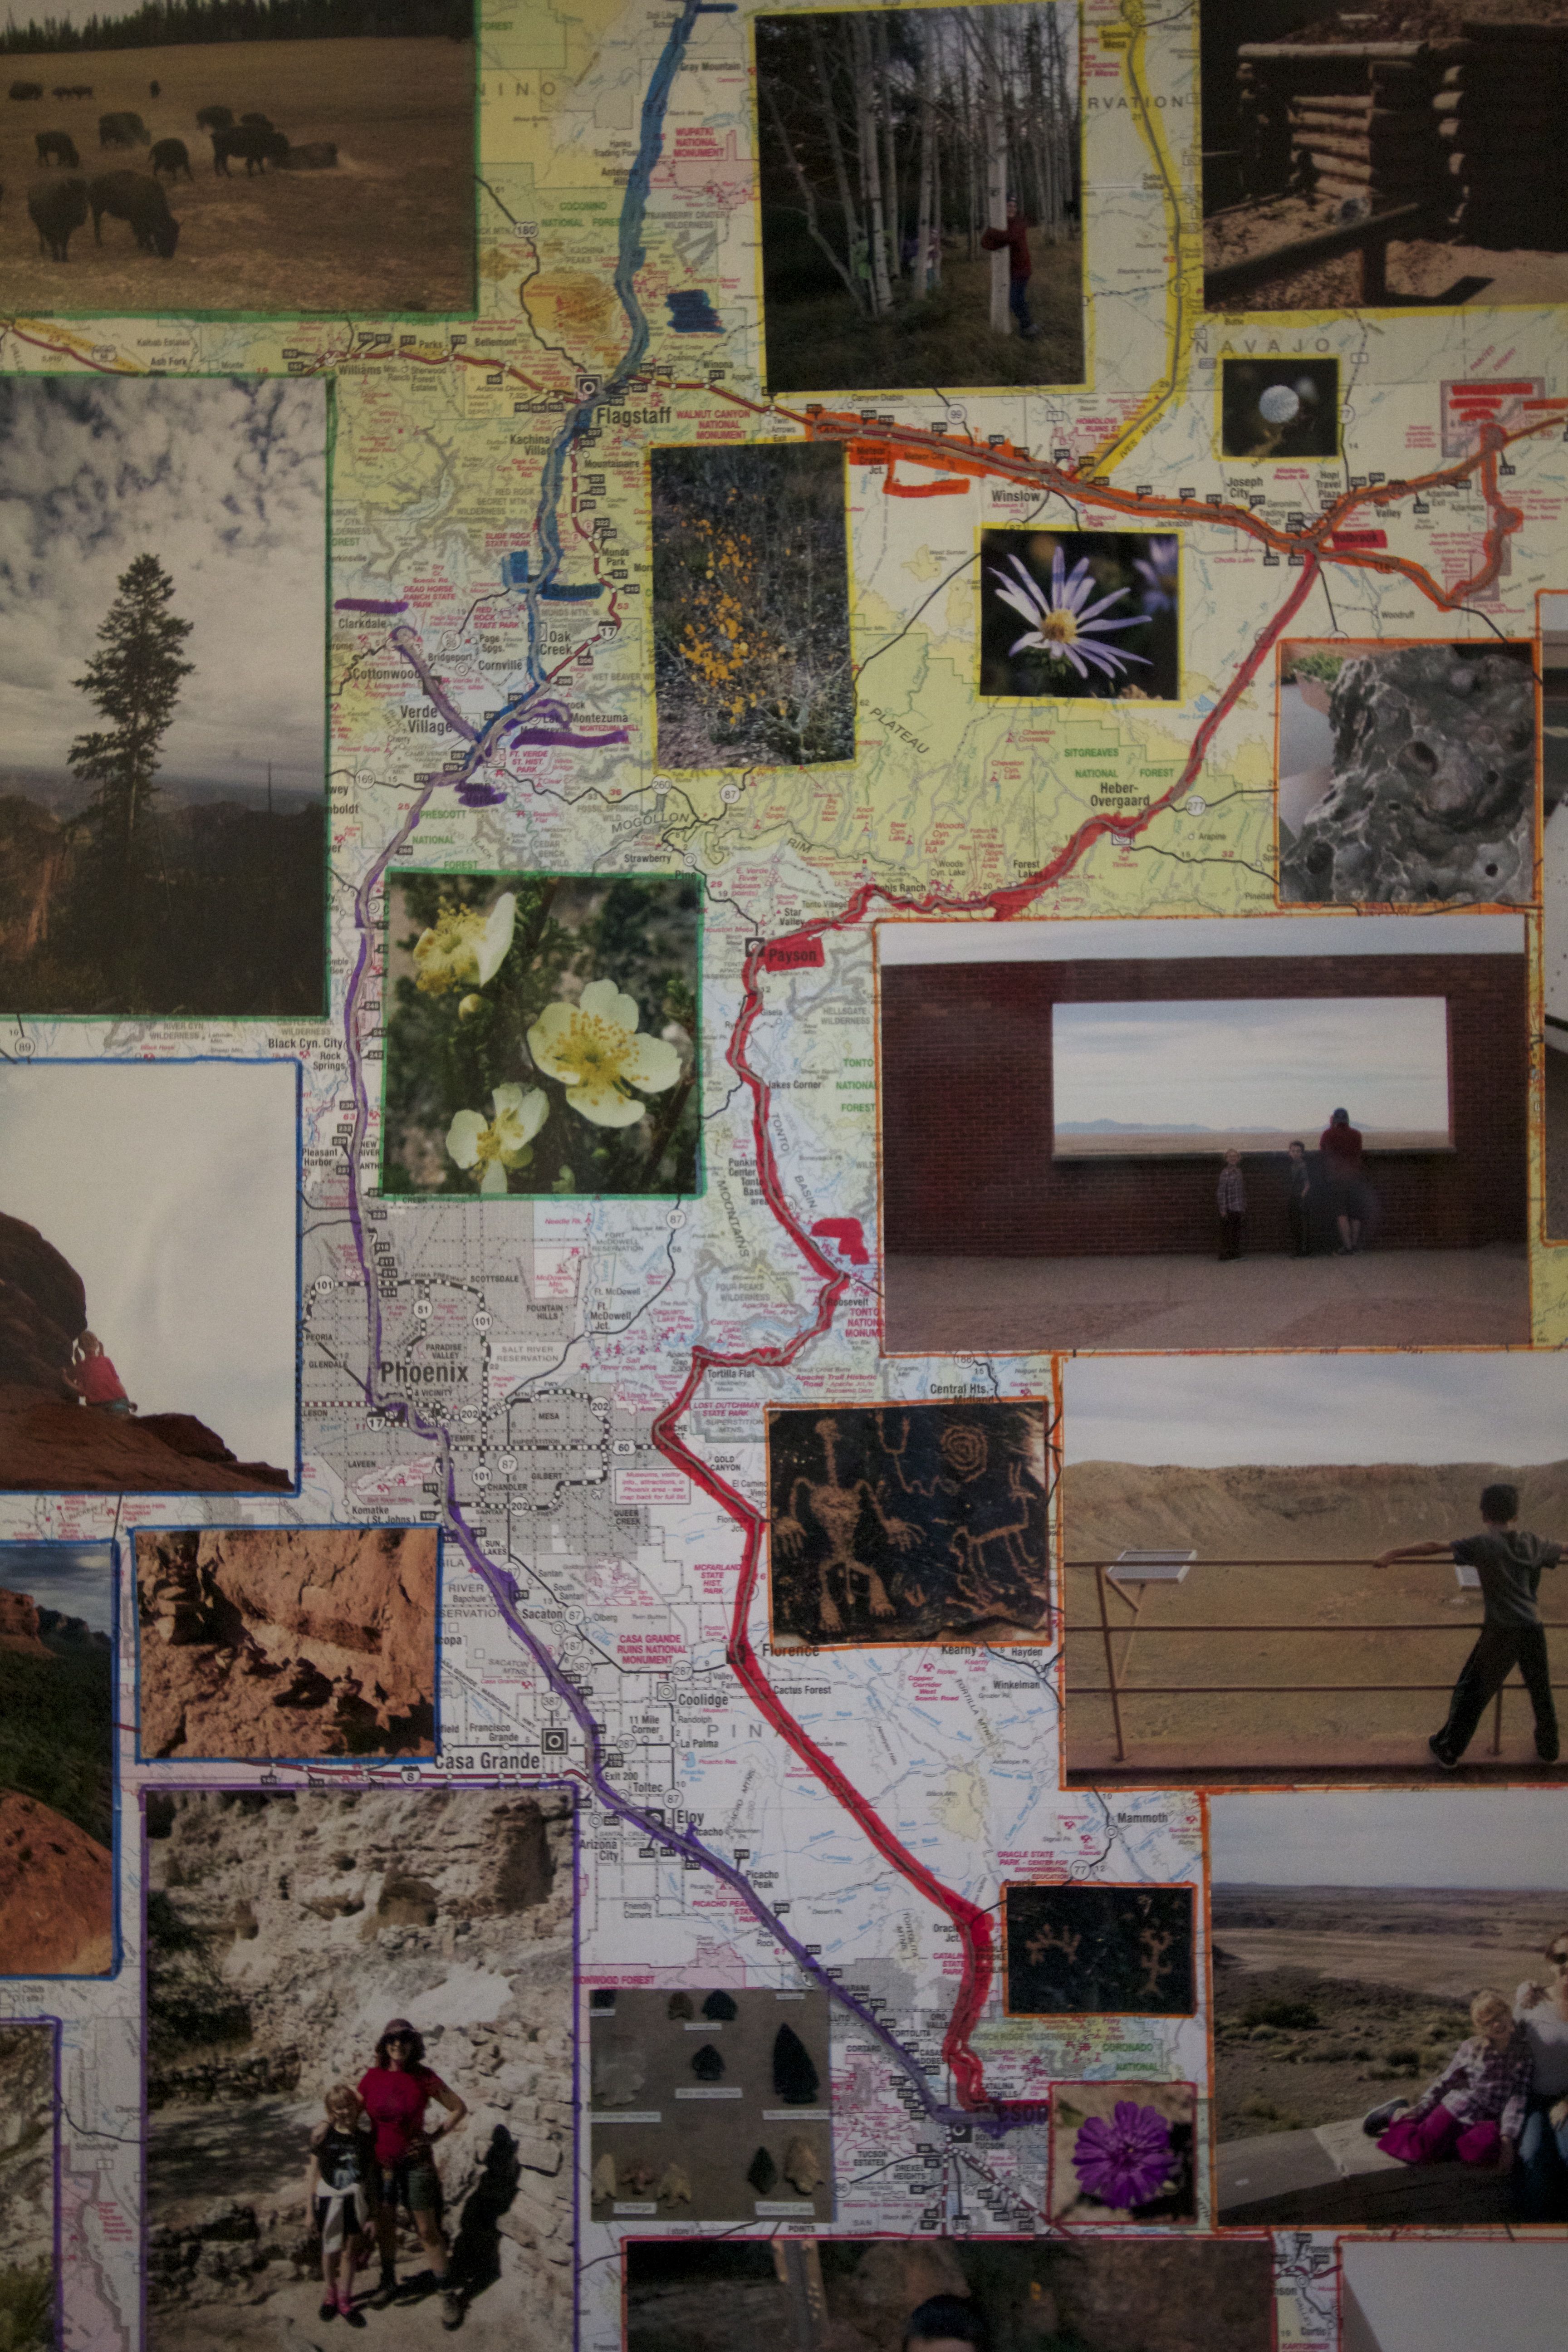
Perhaps influenced by my Trickster’s Hat experiments, I had another idea. I saved up all the ephemera from the trip (national park handouts and such) and printed out a couple dozen photos. (When was the last time I printed out photos? Maybe 2006! We didn’t even print our wedding pictures.) Then I mounted the photos on the map.

6 days of no holds barred sightseeing, compressed into a single rectangle.
As it turned out, there wasn’t room for the ephemera. There were empty spaces, but none big enough for the inset maps or other things. Instead, I printed out a second round of photos with small details like flowers, petroglyphs, and animals, and added them like marginalia.
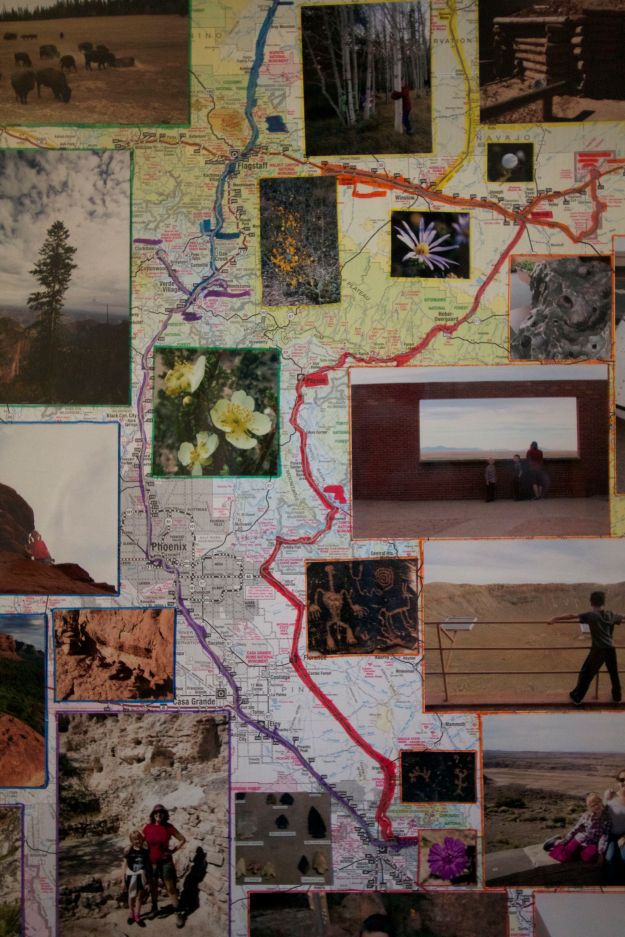
Close up on (most of) the route.
Then I remarked the route, color-coding it by day so you can easily see where we drove on each leg of the journey. We were gone for 6 days, which allowed me to make the color code a rainbow. Then I bordered each photo with the corresponding color so you can easily see on which day any particular image was taken.

Use this product to stick things to paper.
This project is perhaps a bit craftier (rather than artier) than the stuff I usually do. As evidence, I present this glue product. I wasn’t sure what to use, so I asked the Cat, who is an accomplished scrapbooker. She recommended this stuff, which is a very sticky glue loosely affiliated with a waxy tape. You just run the device over the thing you wish to glue and the glue transfers effortlessly from the tape to your picture, and doesn’t wrinkle the paper like some glue does.
You have to be careful because it is extremely sticky. If you run the device over a spot you’ve already gotten glue on, it can jam the works; and once you place your image, it’s pretty difficult to get it back up again, so you need to get it right the first time.
I had the map professionally framed, because it’s a weird size and there was no way I could buy a frame off the rack. Although lately I wonder if I ought to learn how to frame things myself. They mounted it and made it look quite professional, and I picked it up this afternoon. The kids loved it. The framers loved it too.

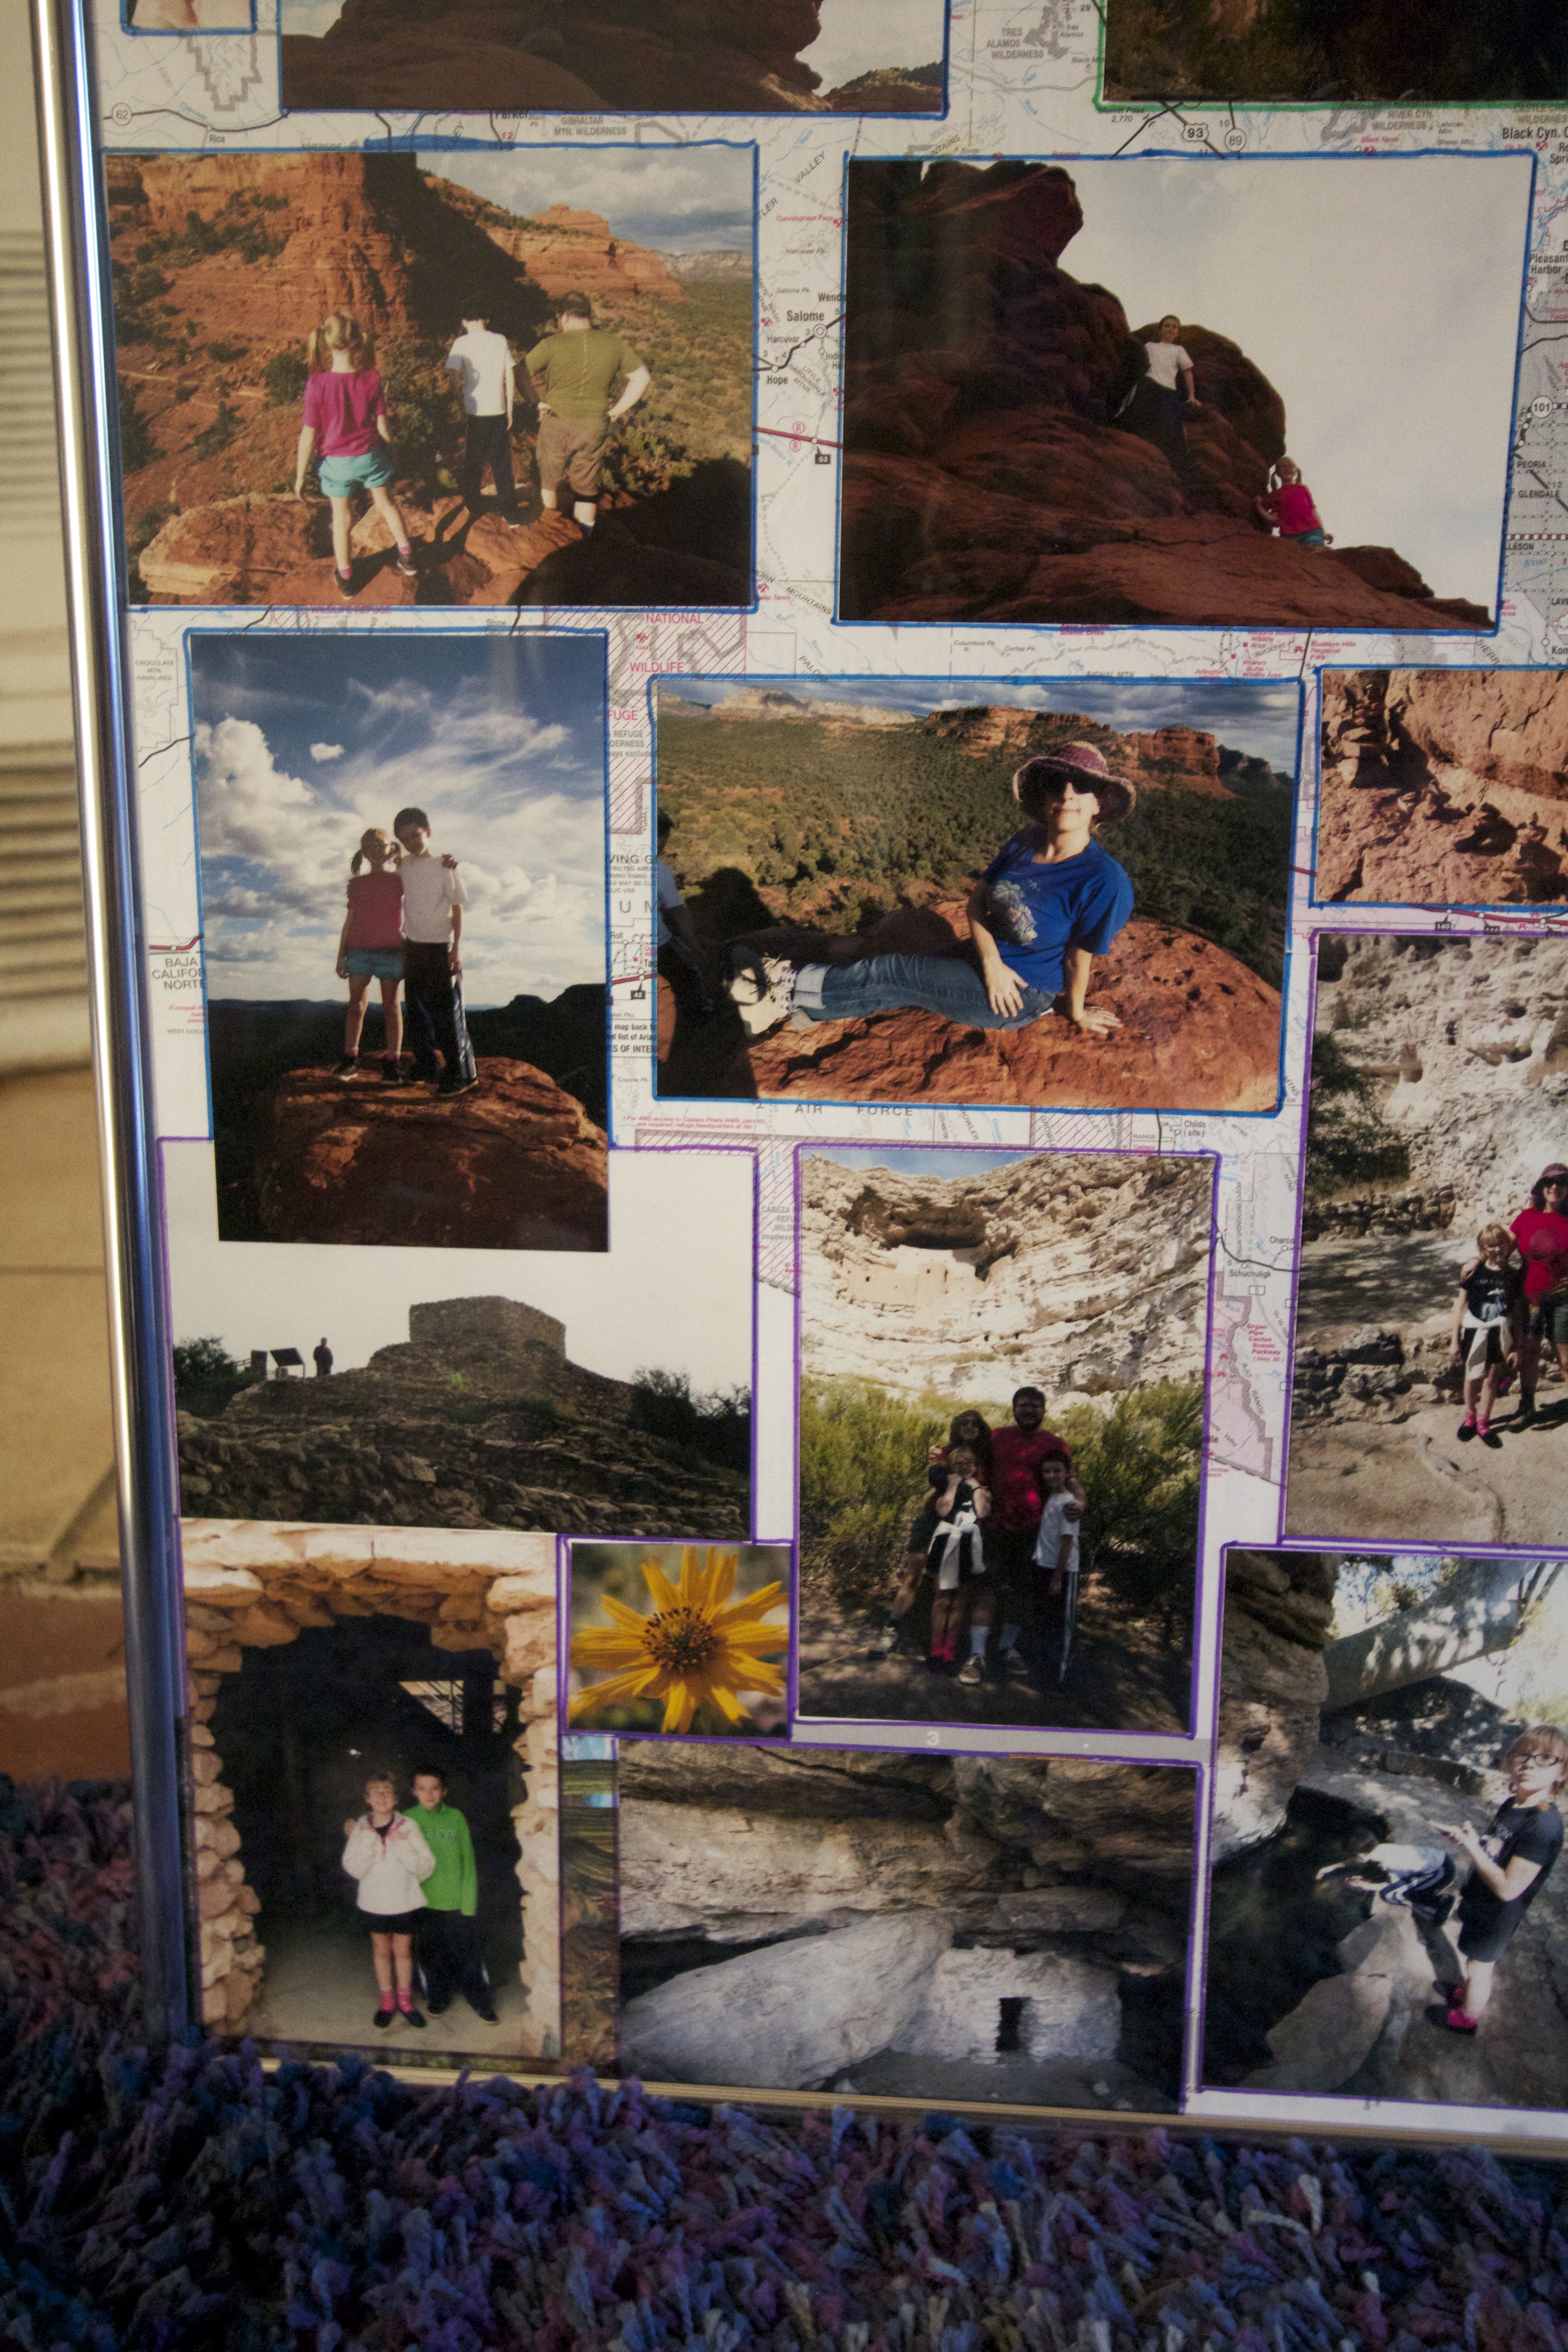
Detail from days 5 and 6: hiking Boyton Canyon and the Sinagua ruins near Sedona.